EQ6 PRO – First Light
Introduction
Only four
days prior to writing this, I picked up a new EQ6-PRO mount from a local dealer
of things optical, Sirius Optics. Having had many mounts over the years, I had a
good feeling about this one. The EQ 5 and 6 seemed to have taken off in
popularity and the latest round had a ridiculously low price tag of Aud$1490.
Roughly a quarter that of a new G11 with Gemini and one fifth that of a Vixen
Atlux with Starbook, both of which have a similar load ratings and feature set
to the EQ6. So, I thought it was worth a try.
My goal
was to put it to use imaging with my main system, an Intes MN-61 6”f6 (900mm)
Maksutov-Newtonian telescope with an ST-10XE camera which yields an image 50 x
30 arcminutes at a scale of 1.5 arc-seconds per pixel. The same system used
with both the G11 and PME.
Over the years
I’ve owned and used a few mounts, a Vixen Super Polaris, Vixen Great Polaris DX
with Sky Sensor II, Losmandy G11 with Astrometric Skywalker control system, a
Software Bisque Paramount ME and now an EQ6-PRO. Moving from a Paramount ME to
an EQ6 may seem like a bit of a strange move, but in a way it was good in that
I had very few expectations of the EQ6 after almost two years of experiencing the
impeccable performance of the PME. The PME really is in a class of its own and
with a price tag ten times the EQ6, I wasn’t prepared to even consider comparing
them.
First Setup
First setup
was in my office so I could put everything together in comfort, which turned out
to be not that necessary. Setting up the EQ6 was as straight forward as it comes.
I only had to check the manual once to find out where to put the hand controller
holster. So setup in no time, I wired it up to my trusty 12vdc 11-amp power
supply that has been going strong for over ten years, and turned on the power.
The first thing I did was enter my site coordinates and enter the time and
date. The hand controller menu layout was straight-forward enough to work the thing
out without referring to the manual at all. I like to do this in order to see
how intuitive the controllers are. In this case, the SynScan was a very
pleasant surprise, very unlike my first attempt with a Gemini system for
example (which is, another story).
Into the Observatory
I’d say within
half an hour of first setup, I was happy enough that everything was in good
working order, so powered down for the night. The next day, I dismantled it all
and moved it into the Tin Shed Observatory, setting up the tripod over the slab
(laid in 1997) that at different times has held the pier for the GP-DX, G11 and
PME and at some point in the not too distant future, the EQ6 pier. For now the
tripod would do.
Setting up
the mount for a second time took literally 10 minutes. I retrofitted the supplied
dovetail to the 6”rings for the MN61 and everything went together perfectly. I
checked both RA and DEC axes for play, as my G11 had some lateral RA play that
could be easily seen by grabbing the counterweight shaft and attempting to rock
it towards the RA gear. To my great relief, the EQ6 had a fraction of the
movement that the G11 had in that axis. Though I must point out that I never
identified this as causing any particular issues, it always played on my mind
as being a possible cause of problems.
At this point
I started cabling. PC controller serial port to the Synscan hand controller,
ST10 autoguider output directly to the AG input on the EQ6 (no relay box), dew
heaters cables and Robofocus controller.
I started
The Sky V6 Professional and changed the mount from being a Paramount ME, to a Celestron
Nexstar and tested the connection. It all worked first time! I could slew the
mount directly from the motion controls in TheSky. This was all just too easy
really and at this point I remember thinking the only system I have ever setup that
went this smoothly was the Paramount ME, without exaggeration.
Rudimentary Polar Alignment
Once I had
the telescope and dovetail on and retaining knobs tight, I prepared to balance
the scope. But first, I put it in a rudimentary polar-aligned position. For
this I first set the mounts Altitude to about 28 degrees (my site is at 27.9S).
For Azimuth I use a compass, placed in direct line of site with the mount and
about 4 meters in front of it (outside the observatory). The compass is aligned
so that it is pointing approximately 11 degrees east of magnetic south, to
allow for the magnetic deviations from my location and placed on the ground so
I can see it easily from behind the mount. Then I align the mounts azimuth so
that it is aligned with the compass simply by line-of-sight from behind the mount.
This technique though crude, generally gets me close enough to have at least
one of the Octans trapezium stars in the polar scope. And this occasion was no
different.
One thing
I should mention at this point, is that lifting the Altitude axis with the mount
fully loaded may not have been the wisest move as the altitude levers were quite
hard to turn. This was made easier by turning the altitude lever while
simultaneously pushing up on the counterweight shaft from beneath it. I may
also say now, that this is just one instance where reading the manual first is
a good idea as difficulty lifting the altitude axis with the mount loaded, is
duly mentioned, I found out later!
Balancing
Doing DEC
first, by tightening the DEC clutch and loosening the RA clutch to move the scope
so that the counterweight bar was horizontal. Then tightening the RA clutch and loosening the
DEC clutch while holding the scope. I could feel it falling forward. It was front-heavy,
so released the RA clutch and straightened the scope again in order to slide
the dovetail and scope backward in the mount. A few iterations through this
routine got the scope balanced well enough in DEC so that the telescope would
sit with clutch loosened in, any position I placed it in. I should note that
the scope with filter wheel, camera, mounting platform (for 60mm scope/camera lens
and secondary camera) are all balanced already within their cradle and this simplified
the effort of balancing the mount. I simply had to get the lot in the right
position within the mounts dovetail and balanced with the counterweights.
Balancing
RA was a similar experience, except obviously the counterweights are moved instead
of the telescope. The main point here being, that all this went very smoothly with
no issues surfacing to dull the experience. My confidence with this mount continued,
though I was still painfully aware that the proof was in the tracking!
Polar Alignment
As it had
been a couple of years since I used a polar alignment scope from the observatory,
I was very glad that I looked through it in daylight, because it was at that
point that I had to go and get my pole-saw and spend an hour chopping down
branches. It’s amazing how much trees grow in two years while you’re not watching
them. I’ll skip the details of this, but suffice it to say that it was a lot
more physical work than setting up the mount itself.
So, with the
mount roughly polar aligned, and a distinct hole in the foliage canopy around the
southern pole, I waited for sunset. Unfortunately though, sunset brought moonrise
and it was a beautiful night with a very full moon. With the scope pointing
east so that the polar scope was exposed to the sky, I powered up and looked into
the illuminated reticule for the first time. To my horror I could see nothing
but bright red light! I remembered reading about this online somewhere and
immediately wondered what I could do, as this brought the entire process to a
dead stop. Or so I thought. What if the polar scope wasn’t focused ?
Turns out
the polar scope wasn’t focused. It was so far out of focus that no stars were visible
at all. The EQ6 must ship with the polar scope eyepiece screwed all the way in,
which makes sense really. Turning off the power and peering through the scope,
I started screwing the eyepiece out. After quite a few turns, out of focus stars
started to appear and I knew I was onto something! After a few more turns, the
stars were quite obvious and well focused. Actually bright enough to be seen
even with the illuminator switched on, just. And Sigma Octans was sitting just
near the bottom of the field of view.
The illuminator
was still slightly too bright to see all the stars in the group, and with no
way to dim it, or turn it off I had to resort to blinking it with the mounts
main power switch. Something I felt a little uneasy doing. But it did help to
get all four stars into their little circles. Not all perfectly centred, but
close enough for me to test the mount out. I was happy enough!
First Use
With a close-enough
polar alignment, everything balanced, camera powered up and connected...I was
ready. I roughly placed the scope in the
starting position, locked the clutches and powered up the mount. I thought, why
not take it easy and see what it can do. I slewed to Alpha Centaurus for a
one-point alignment and started imaging with the main camera binned 3x3 taking
0.1s exposures.
I was absolutely
amazed to see that Alpha Cen was only about 25 arcminutes from center, out only
in RA. So using the hand controller, I moved it to centre and aligned on it. So
far so good. What now ?
I thought
a good quick pointing test would be to slew across the meridian, to NGC104,
rising in the south-east. When the slew was complete, I took a 30-second image
and was amazed to see 47 Tuc sitting only about 10 arc minutes left of centre.
And it was perfectly tracked!
Time to test
the tracking. With no PEC, polar alignment only by the polar scope, and only a
single star alignment, I took a 60 second unguided exposure. It was identical. So
I progressed, 2-minutes and there was no change at all. The image below shows
the 20-minute image with the cluster where it was placed after the first slew.
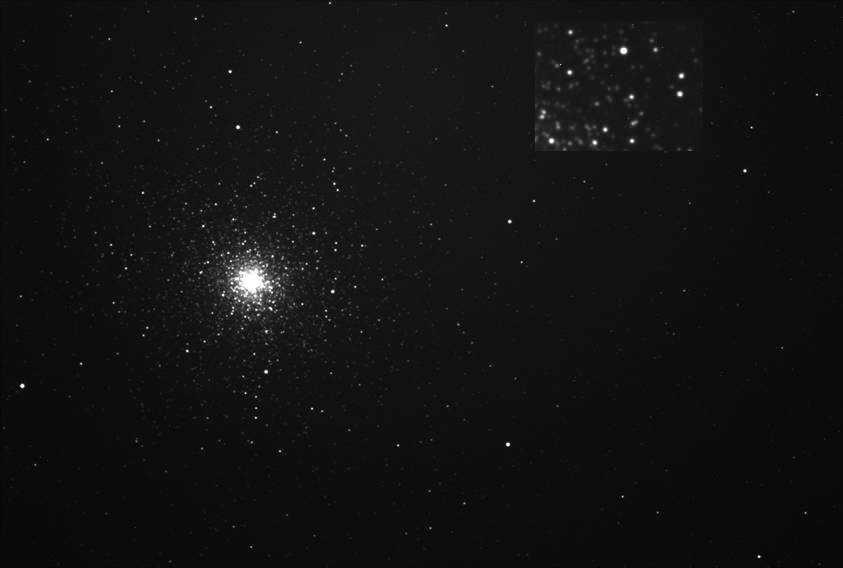
First slew – single
point alignment, no PEC, unguided, 120-seconds
I then centered
the cluster using the motion controls
from TheSky, which worked perfectly and continued on my quest to see how long
the mount could image unguided. 3-minute, 4-minutes, 5-minutes!
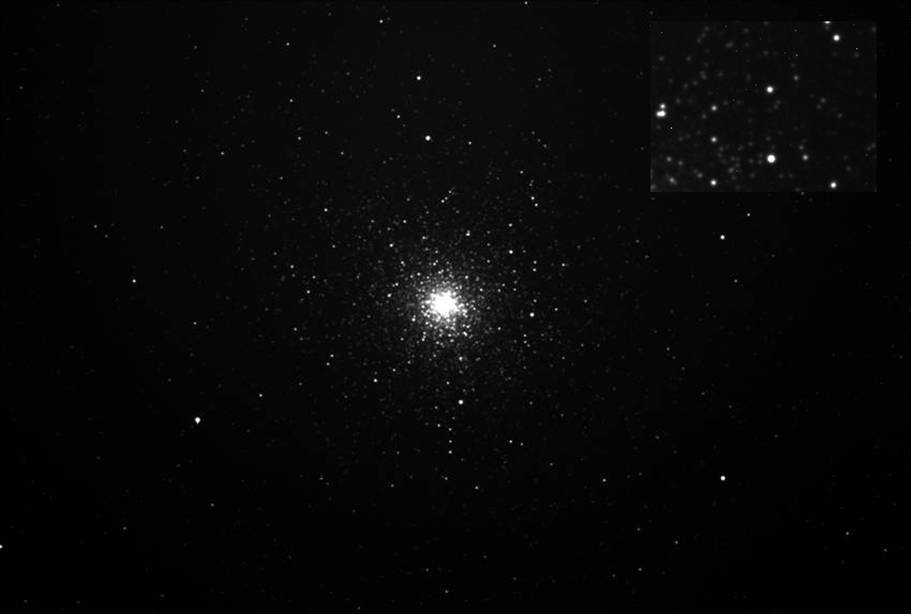
5 minutes unguided
Deciding to
jump right in, I took a ten minute image which revealed a very slight elongation
in the stars, but I have only used one mount that could pull that off, and it
cost ten times more.
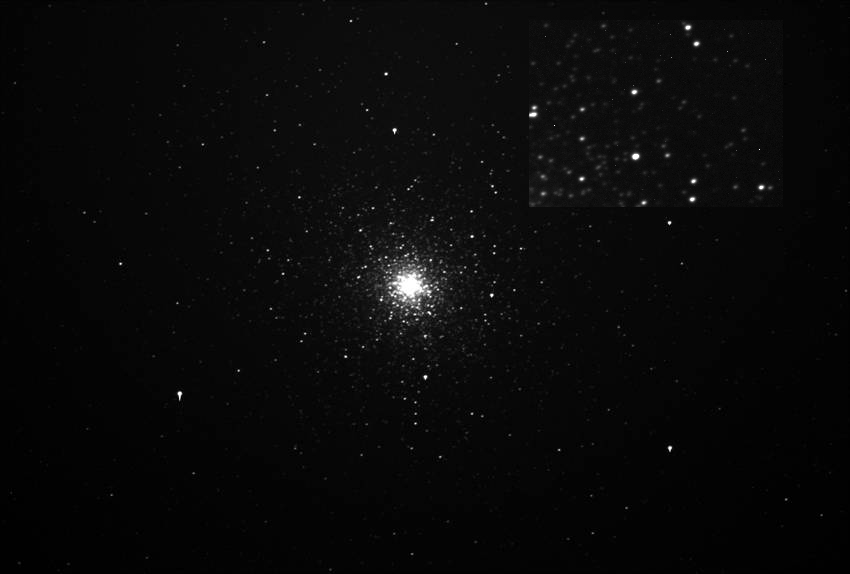
10 minutes unguided
– only slight tracking error
Happy enough
with unguided performance, I considered several factors that could improve
this, including better polar alignment and PEC training. But now I wanted to
test its abilities when autoguided.
Autoguided
Autoguiding,
like everything else so far, worked perfectly first time. That is after I changed
the guiding method back to Relays from Direct guide, which only works with the
Paramount ME. I selected the bright star at lower left and calibrated the main chip,
which succeeded first time. Then switched to the ST10s autoguiding chip and
calibrated it on the brightest star in the field, it all went like clockwork
and I started the autoguider running using 1 second guide exposures. Watching
the corrections come up gave me a great sense of joy. The error corrections
being made were very small, much smaller than I was used to seeing with the
G11, slightly larger than the PME, but very good nonetheless. So I thought a
good test would be a 20-minute guided image. And it came out perfectly. There
is significant blooming due to the fact that the ST10XE is a NABG camera, but
the point of this test was tracking above all else and it did this swimmingly.
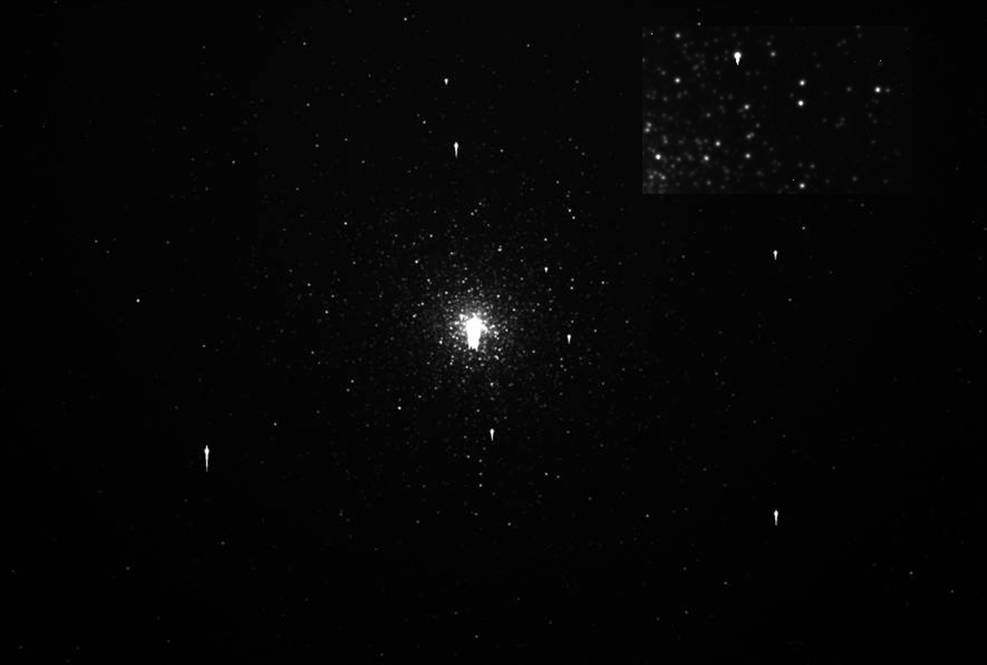
20 minutes self-guided by ST10XE
The big Test!
So by now,
with everything having gone far better than I ever would have expected, it was
3am and I had a good three hours of darkness left to see what this mount could
really do. One thing that I routinely got the PME to do, was take very long
guide exposures in order to guide through narrowband filters, which naturally
enough attenuate guide stars significantly. Being a full moon, the conditions
were right to see how the EQ6 would compare in this regard.
I have in
the past done a fair amount of imaging the nebulae in the Large Magellanic Cloud
through hydrogen-alpha filters. Typically in order to get a guide star through
a 6nm Ha filter, guide exposures between 10 and 60 seconds are needed. I decide
to try and image a group of nebula at the edge of the LMC, that I had been
meaning to image for some time. So I slewed to NGC1833 and centered the group
comprising of NGC1833, NGC1837 and NGC1845. A quick series of test images through
the guide chip revealed a bright enough guide star for 30-second guide
exposures through the Ha filter. I setup an imaging sequence to take 15-minute
guided images for three hours, until sunrise and started the guider. I was so
excited that I watched the first hours worth of images turn out perfectly and
watched the guider to ensure there were no mishaps the entire time. Everything
was working well, there were no clouds forecast and so I decided to let it
continue and go to bed happy.
I woke up
hours later to find that everything had gone according to plan and I had three hours
of exposures with no discards! An outcome I was very happy with.
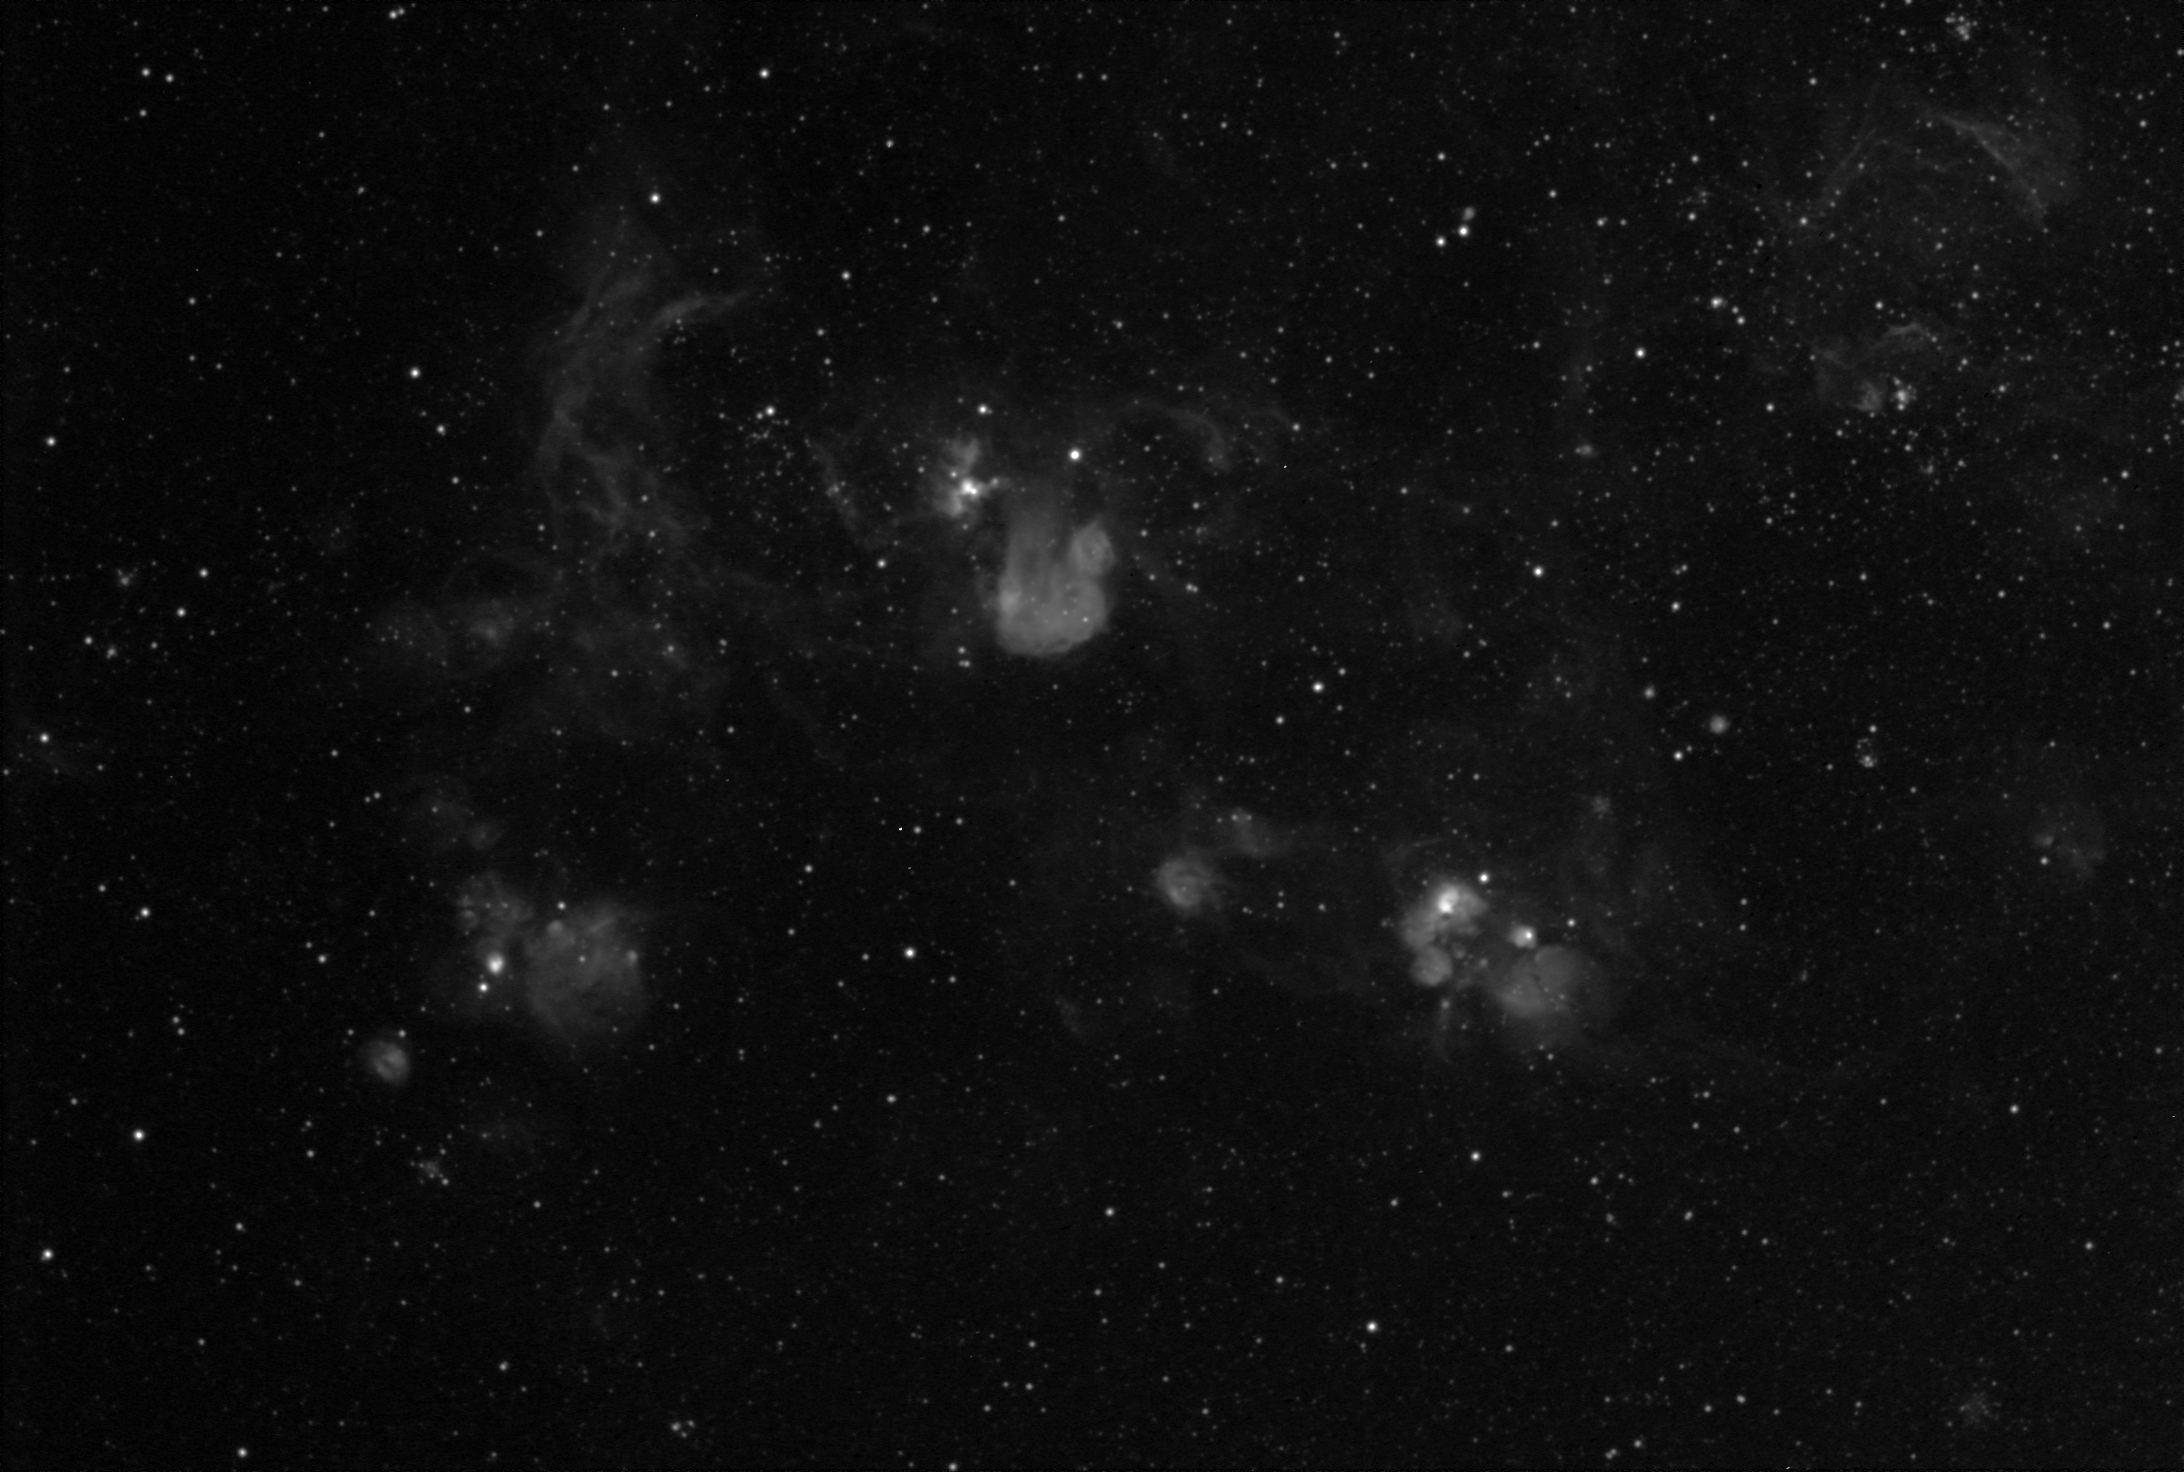
Nebula group NGC1833, NGC1837 and NGC1845 in the LMC.
6nm Ha filter, 3 hours
of 15-minute images 30-second guide exposures.
Unprocessed apart from
image calibrations, registration and mean combination.
Conclusion
I have to
say that the performance of this particular mount has blown my socks off. It has already far exceeded my expectations
and so far it is performing so close to the PME that I feel no embarrassment in
comparing the two. I mean they are really in entirely different leagues, yet
their performances to date are indeed comparable, for my specific requirements
and optical system. I wouldn’t presume
to go so far as to compare the two mounts for anything more than the specific
tests done here as the PME is a masterful goliath that would excel in any more
rigorous comparison I’m sure! Getting the G11 to work to this level required
quite a bit of effort on my part and to be honest I was expecting a similar
laborious effort to get the EQ6 to perform on par. Quite honestly, this EQ6 is
performing as good if not better than my G11 ever did, in all aspects of its
operation. Something I was seriously not expecting.
I’m one of
those that believe that you get what you pay for, but this EQ6, if it continues
to perform as it has been, is proving to be an exception to the rule! You
definitely get a lot more than you would expect from what you pay for.
Now onto
the longevity test. Only time will tell.....
Eddie Trimarchi
Tuesday, 19
August 2008