 |
Previous Equipment - C8 and GPDX |
|
|
Previous Equipment - C8 and GPDX |
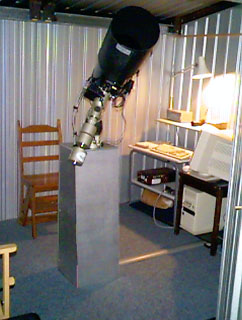
| Main Scope | C8. Celestron 20cm diameter x 2000mm focal length Schmidt-Cassegrain telescope. |
| Guide Scope | Vixen 70s. 70mm f5 (420mm focal length) refractor with micro-positioning adjustment. |
| Finder Scope. | Celestron 80mm Right Angle finder with illuminated reticle with brightness control |
| Mount | Vixen GP-DX. 10kg Capacity. |
| Drives | Vixen Sky Sensor 2000 Computer Controller with V2.00 Beta Bios . |
| Main Camera | Starlight Xpress SXL-8. 512x512x15um (Philips FT-12) cooled CCD. |
| Guiding Camera | Cookbook CB245. 378x242 (Texas Instruments TI245) cooled CCD camera mounted on the 3.5" Maksutov guide scope. |
Accessories |
Homeyer MFWFM. (Motorised filter wheel and flip mirror). True Technologies Colour dichroic filter set Kendrick Dew heater system |
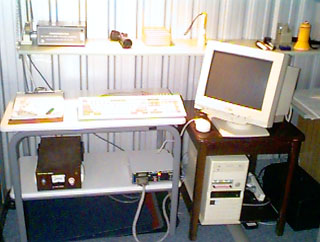 |
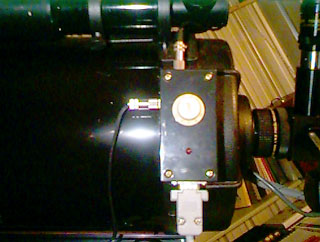
A Micronta 12vdc 8-amp regulated power supply provides 12vdc to the entire scope and powers; the finder reticle, CB245 cooling fan, Kendrick Dew System, Sky Sensor 2000, motors and the Cookbook auto-guider. Also visible in the picture is the wooden Cookbook power supply and SXL-8 parallel port interface. |

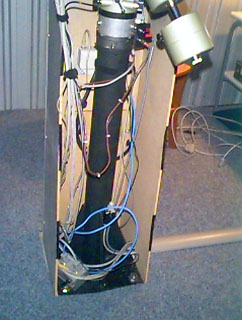
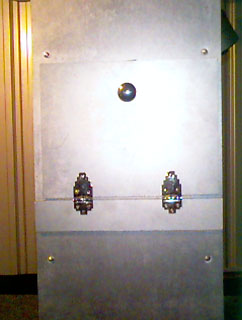
 The wiring runs from the control centre to the scope within a 4-channel cable housing shown above-left with the cover off, and emerge next to the pier where they go their own way. Here the pier housing has the back cover off. The cookbook auto-guider unit is the aluminium box resting on the pier base plate.The picture on the right shows the top of the pier housing where the camera and motor cables emerge on the right and the power cables for the scope on the left.
 |
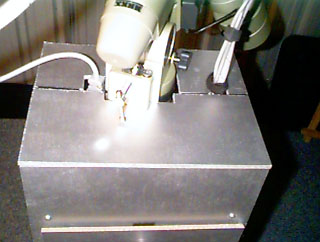
The 12vdc power cables run up to a junction box mounted to the side of the rear cell at the original fork-mount points. This box supplies 2x 0-3vdc for illuminated finder and reticle (by the original Fender Stratocaster tone control knob), 12vdc to the Kendrick Dew system, +-12vdc for the motor focus, 5vdc for the Cookbook cooling fan. |
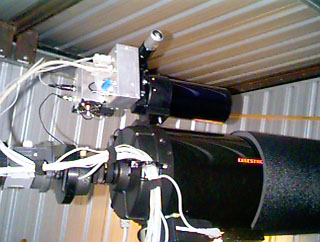 |
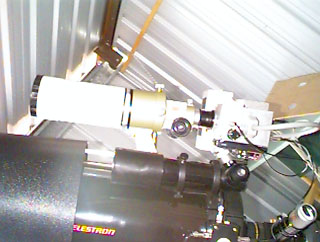
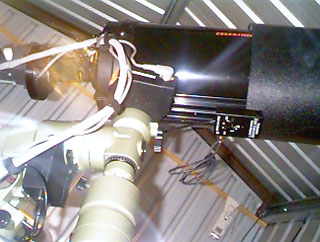
The motor and camera control cables run up to a metal loom on the side of the scope where they then split up and go where they have to. The upper shiny thing attached to the ETX (affectionately dubbed MIR at the 1997 Queensland Astrofest by Mr Peter Adam. Thanks Peter.), is the Cookbook 245 camera which was used to take all of the pictures on the CB245 astronomy images page. It is now a seriously over qualified auto-guider and is doing a very good job. |
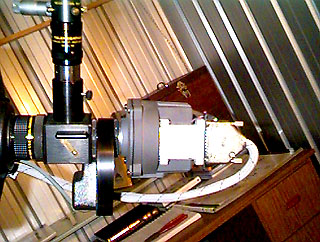 |
The SXL-8 camera is attached to a Homeyer filter wheel , which is in turn attached to the Homeyer flip mirror , which is connected to a Meade f6.3 focal reducer, which is attached to the C8 rear cell. I usually have a Meade Series 4000 2x Barlow and Meade 9mm Illuminated Reticle in the eyepiece side of the flip mirror. This is used for accurate pointing during Sky Sensor line-up. The whole barlow/reticle can be removed and a 30mm or 40mm eyepiece placed in while retaining focus to the camera. |
|
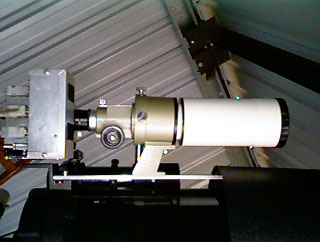
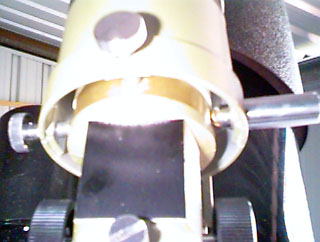
After a long hard search for the perfect guide scope, I have settled on a Vixen 70s guide scope and it is great! The built in mount has very large micro-adjustment screws for fine pointing of the scope which is great. The entire 70s+Cookbook 245 is 2.5kg which a little heavy, but with a counterweight arm extension of 70mm, I can just balance the entire scope with about 6 kilograms of counterweights. I would say the mount is at or slightly over its weight limit of 10kg. I made a mounting rail from 6mm x 50mm flat aluminium which attaches very rigidly to the standard accessory mounts on the front and rear-cells of the OTA and it is very rigid indeed. The whole thing feels very sturdy and I anticipate no flexure problems. One limitation of the 70s is that it has only a 420mm focal length, so at least a 2 times barlow is a necessity, and I will probably purchase a 3x barlow in the not-too-distant future. Major advantages are accurate pointing on or off axis, mount rigidity, and no mirror shift (compared the ETX). There is a 2x barlow between the CB245 camera and the scope. The bottom picture shows a close-up of the 70s integrated pointing system. I am not sure whether the pressure system uses heavy duty springs or not (someone suggested compressed air or gas but springs seems to make more sense.), but it is very solid and moves very smoothly. Much preferable to standard rings which I have a personal distaste for! |
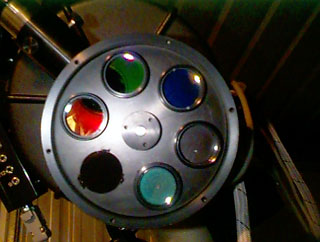 |
Here is the open Homeyer filter wheel with filters installed. Going clockwise from the Red filter they are, Red, Green, Blue, Clear (for focussing), Lumicon OIII and Opaque (for dark frames). The colour filters are part of the True Technologies 1.25" dichroic filter set. An Infra-Red blocking filter is permanently in-line, once the SXL-8 camera is attached, and is mounted in the camera-to-filter wheel adaptor. |
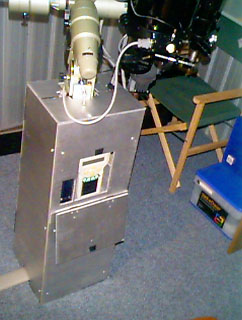 |
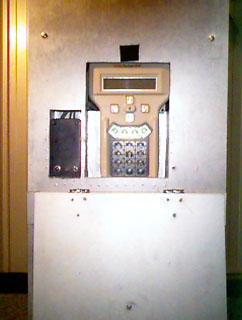
The pier housing is made of 6mm composite board and painted silver. It has a door which can be opened to reveal both the Sky Sensor and motorised filter wheel hand controllers |
 |
 |
 |
I recently managed to see one of the Kendrick systems in action. While all of the other scopes were being blow-dried a Vixen 4" Refractor in the field with the dew system was completely dew free! I was sufficiently impressed to buy one immediately! Rather than mess with home-made bits (my home-made dew zapper failed miserably that night) , I bought the entire system. A single heater element for the corrector, a Kendrick dew shield and a System IV controller. To date I have used it once. The C8 corrector was bone-dry and the ETX was completely dewed over. I might have to get a 4" element for it. The picture shows the Kendrick Dew cap on the scope, and the Series IV controller that is held in place with Velcro, on the underside of the scope. |
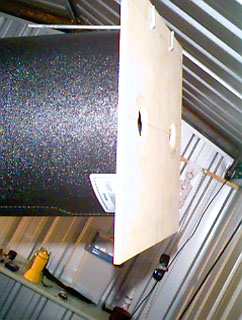 |
Like everyone else that has ever tried it, I initially had great difficulty learning how to focus. After trying many solutions I found that a Hartmann mask was by far the easiest method, and you can make them for a few cents. I had some left-over 6mm composite board and made this one with it. The holes are 38mm in diameter and as far apart as possible while remaining within the 8" diameter of the corrector plate. I place the mask on the end of the dew cap for simplicity. The two wire arms at the top of the mask allow the mask to sit snugly on the dew cap regardless of the orientation of the scope. |